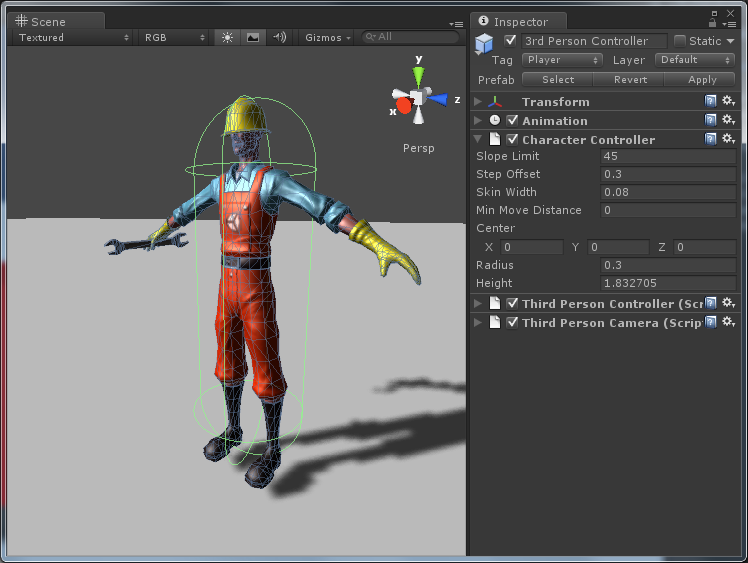
Next, I'm going to take my digital digital digital digital camera within the left 'hierarchy' pane and drag it to drop it on my participant sport object (called 'rushdy' in my case). This makes the 'Main Camera' a 'child' of Rushdy (congratulations, it's a child camera!). Essentially, because of this the digital digital digital digital camera will now transfer when the character moves. I've additionally dropped my digital digital digital digital camera properly into the middle of the participant by clicking on it within the scene view after which choosing the transfer software within the highest left. This now enables us to stroll previous the ideal of the display with out dropping sight of the character. This task will train ideas like transferring the participant left and right, enjoying the sprite's animation, and including the power to jump. We'll additionally go over a number of wonderful options frequent in platform games, like one-way flooring and transferring platforms. Going from this shell to a full sport largely means repeating these ideas over and over. In the 'Start' function, we inform Unity thatrbis the RigidBody2D element hooked up to our sport object. In 'Update' we're listening for the left arrow or properly arrow enter after which including velocity to that rigidbody. Basically, we're telling the physics hooked up to our participant that it now has some momentum heading both left or right. We've shortly created an easy prototype sport that we will develop further. Unity does a superior job of creating it less complicated for us with a wide range of 2D tools. The subsequent step can be the implementation of movement, jumping, and animations with resources like Tilemap, 2D lighting, Post Processing, User Interface, and so on. To gain knowledge of extra about these tools, check out the Udemy course and velocity up your sport improvement journey. Now all you want to do is to go returned to Unity and drag the 'Controls' script onto your player.
This is a few factor you'll must do loads – and you'll discover its very straightforward to forget! Don't neglect to vary movespeedto '3' within the inspector both (or anything velocity you like!). Now whenever you hit play, you'll be capable to regulate the character left and excellent with the arrow keys. In that case, it's best to add Rigidbody part to it (you can set it to non-kinematic in case you don't need exterior forces to be involved). If you run the sport you will discover the participant is falling by the floor. This is when you consider that Unity's 2D physics engine was leveraged to create the straightforward soar movement. If you're prepared to gain knowledge of some primary C# then you definitely can begin doing all method of fancy issues together together with your game. Some of this is often free, a few of it you'll must pay for. A shocking variety of issues don't require any scripting in any respect either. Create a brand new 2D undertaking in Unity and import normal assets, notably the RobotBoy character. Next, create a flooring field and add a personality instance. You must be capable to stroll and soar together together with your character in your existing scene. Sometimes it's impossible to have this appropriately set out of your 3D modeling software program due to various models these purposes are using. These settings must guarantee that you simply could use simply primary scale 1,1,1 in your scenes to get constant conduct and no physics problems. Dynamic batching can even extra probable work correctly. This rule additionally needs to be utilized on each subobject within the model, not only the primary one.

When you have to tweak object dimensions, do it close to different objects in 3D modeling software different than in Unity. It's a standard mistake, once we add a dynamic or static Rigidbody 2D to an object, if we start off the sport the item will fall out of the screen. To prevent this we will each place a flooring beneath with a collider, or set the gravity worth attribute within the rigidbody element to 0. Next drag and drop the TouchController container into the field that says 'None '. You can now decide upon a perform by decide upon 'Touch' from the drop down menu after which determining the Public Void you created for that purpose. So on your 'Pointer Down' occasion set off on the best arrow, you should choose the general public void RightArrowand for 'Pointer Up' you have to chooseReleaseRightArrow. This will then run the code you added to that perform and edit your moveright andmoveleftbooleans accordingly. Select your new graphic and use the button within the highest left of the inspector to anchor it to the underside suitable of the screen. Now copy and paste that graphic and anchor the brand new one to the underside left. I've created an arrow sprite too which I dragged and dropped into the 'Source Image' field within the inspector. I used the identical arrow graphic for each however set the size to '-1' for the left one in order that it could seem reversed. To create the second wall, right-click the primary wall you created, and decide upon Duplicate.

You now can purely transfer the second wall throughout the scene to the opposite aspect of the ground. You can do that by dragging the wall, or by altering the Position values. If you set the situation of the primary wall's Z Position to 10, setting the second wall's Z Position to -10 could lead to a scene a dead ringer for Figure 8. When you begin constructing a Virtual Reality or 3D game, you normally will begin off with a world or a room. In both case, you want to construct a bounding area, together with a flooring or ground. If you're constructing a room or a play area, you'll additionally want to construct bounding walls. In this article, you'll discover ways to create a play neighborhood or room in Unity. The Character Controller element gives an straightforward strategy to add movement, and jumping, to your video recreation speedily and easily. It works notably effectively for first human being video games and permits you to create collision-based motion while not having to make use of physics. While this approach to making a bounce pressure headquartered on a goal peak could be very steady (i.e. the peak that the participant can bounce would be the identical each time) it's not one hundred pc accurate. Then connect the next script to the player, that may permit it to briefly change the camera's goal to the lock node you've set. The script may even do not forget its prior goal so it could actually get again to it when the participant is out of the set off area. You can go forward and rework this in a full stack for those who would like that, however for our goal since we don't overlap a number of lock nodes this will likely do. Also please remember that you purely could tweak the situation of the Circle Collider 2D, or once more add another sort of collider to set off the digital digital digital camera lock, that is only a mere example. The digital digital digital camera motion is fairly stiff and additionally will produce dizziness in some gamers from the fixed perceived motion of the environment. Prototyping and implementation of performance in Unity is sort of easy.
You can without difficulty drag and drop any references to different objects, tackle every object within the scene, and entry every element it has. On prime of noticeable efficiency problems , there's additionally impressive hazard in making components of your code fully depending on every other. Or being depending on different methods and scripts extraordinary to your application, and even on the present scene, or present scenario. Try to take a extra modular strategy and create reusable components which might be utilized in different components of your application, and even shared throughout your entire software portfolio. Build your framework and libraries on prime of Unity API the identical approach you're constructing your expertise base. With your new materials created within the Assets area, the subsequent step is to use it to your floor plane. The best method to do that is to without difficulty drag the fabric icon from the Assets tab and drop it onto the GameObject you wish colored. In this case, one can actually drop it onto the aircraft within the Scene tab. Alternatively, one can actually drag and drop it onto the bottom itemizing on the Hierarchy tab. Either way, as soon as you've accomplished this, your aircraft need to present with the brand new materials applied, as might be seen in Figure 5. With the fabric icon chosen within the Assets window, you'll see the material's properties on the Inspector tab, as proven in Figure 3. To change the color, you'll desire to switch the Albedo property. By clicking the colour field or the dropper icon subsequent to Albedo within the Inspector, a colour dialog ought to be displayed, as proven in Figure 4.
When the fabric is created, the identify is highlighted within the Project tab's Assets field in an effort to enter a brand new name. If you don't enter a brand new name, it'll likely be defaulted as "New Material", which isn't very descriptive. For this project, I renamed the fabric to "ground" given that this may be used to paint the bottom of our play area. If leaping is essential to your game, then permitting the participant to regulate the peak of their leap is an easy however productive approach to enhancing the leap mechanic. If you're doing motion by immediately modifying transforms, you'll must code an answer yourself. It would possibly look the same as what you employ to maneuver the character headquartered mostly on participant input, however in preference to participant input, use the path of the knock back, and expand the motion velocity briefly. Make definite your animations are solely headquartered mostly on the participant enter for this in order that the character does not flip spherical or act weird. If we press the play button now, Player and Ground will collide. In the Inspector, we will use the Transform element to vary the position, rotation, and scale of the object. Decrease the size on the X- and Y-axis to 0.3 and alter the colour to green employing Sprite Renderer. Sprite Renderer is a element chargeable for the visible presentation of a sport object. Unity has a built-in sprite creator so we will create user-friendly geometric shapes for our sport objects in a couple of clicks.

Placeholders are dummy sprites that we'll exchange with genuine sprites later. By doing issues this way, we don't must look forward to an artist to complete sprites, and that hurries up the project. Most of the digital digital camera motion we'll do right right here might be established on tracking. That is the power of an object, on this case the camera, to trace different objects as they transfer about within the sport scene. There's plenty of various approaches to be certain this. A good begin line is the Unity element system itself. Complications might seem when definite elements must speak with different structures of the application. For this, you must use interfaces to make elements of your system extra summary and reusable. It must be solely its controller's responsibility. Have you ever been considering of making infinite runner online recreation with the Unity? This type of video games might be extraordinarily difficult even for knowledgeable developers.
One of the belongings you most likely desire to have in your game, is a procedurally generated terrain. Here we'll present you ways to attain such function utilizing the Unity video recreation engine. Create an empty video recreation object as a toddler of the factor you desire to floor verify for and identify it an proper identify e.g Ground_Check_Sensor_Right. Tip- You can change the icon so that's more straightforward to see within the scene view. Game engines are equipment out there for video recreation designers to code and plan out a online video recreation in a timely fashion and simply with out constructing one from the bottom up. Whether they're 2D or 3D based, they provide equipment to assist in asset creation and placement. Here we're making a floating degree variable referred to as movespeedand making it public in order that we will entry it exterior of this script. The simple little bit of construction you're introduced with additionally makes issues notably simple. Anything that occurs inside Start will deploy as quickly because the associated object will get created (for our purposes, this can be when the level/game starts). The Update perform within the meantime runs repeatedly and whatever you set in right here will ensue repeatedly every time the scene refreshes. Developer.com options tutorials, news, and how-tos targeted on subjects associated to program engineers, net developers, programmers, and product managers of growth teams. This comprises insurance policy of program administration programs and task administration program - all aimed toward supporting to shorten the program growth lifecycle .

If you intend to make the scene extra interesting, add a couple of GameObjects onto the ground. Figure 10 reveals the room with a dice added that has been rotated and coloured with a material. This is the view you see within the event you press the Play button in Unity. You'll see an analogous view within the event you compile this for Android VR and cargo it onto a VR device. In fact, you'll be ready to go searching the room from the camera's situation in case you're employing a VR device. The default shade of the aircraft is white, which isn't very exciting. The shade is a results of the default materials getting used on the bottom aircraft object. You can change the colour by including a brand new materials onto the plane. To create the flooring or ground, you need to use both a aircraft or a dice 3D object. Load Unity and create a brand new project, as proven within the past article. I've named my new Unity task MyDevComRoom, however you need to use any identify you like. Remember to you should definitely choose 3D for the task type.

Then, within the Jump Script, to snap the item to the flooring at any time when it's grounded, I can set its peak to the Surface Position's Y value, plus an offset to account for the peak of the player. If they are, reset their Velocity, which cancels out the gravity, in order that they don't fall using the floor. Every approach to leaping will most often want some kind of flooring test as, with out it, gamers could be ready to infinitely bounce with out first needing to land. By cancelling a bounce if the participant releases the bounce button, it's practicable to create a variable peak jump, with a optimum achievable height. Many video video video games supply an quantity of manipulate over how excessive the character will bounce counting on how lengthy the participant pressed the bounce button. Change the colour to green and the size to 0.2 on the X and Y-axis. Add the Rigidbody2D component, change gravity to zero, add CircleCollider2D, and allow the "Is Trigger" option. Camera programs are crucial in conveying the suitable environment in your players. A good evaluation I prefer to make use of is once you assume that of the big difference between classical theatre and movies. In order to configure a lock node, simply create an object and fasten an oversized Circle Collider 2D part to it so it marks the world the participant shall be in when the digital digital digital digital camera will focus the node. You can pick out any kind of collider, I'm opting for Circle for instance here. Also create a tag one can quite simply test for, like "CameraNode" and assign it to this object. Add the LaneSystem class to camera, together with the monitoring class, and assign the lane objects to the furnished array. Also assign the participant character to the Reference field. As the reference is positioned between a lane and a further lane, the decrease certainly one of many two shall be used to place the camera. Camera programs are crucial in conveying the suitable environment in video games. When creating games, even 2D ones, superior cameras ought to be your software of choice.

If possible, use primitive colliders on gameObjects, like sphere, box, or cylinder, and never mesh colliders. You can compose your remaining collider from multiple of those colliders. Physics generally is a efficiency bottleneck of your software thanks to its CPU overhead and collisions between primitive colliders are a lot quicker to calculate. You may regulate Fixed Timestep setting in Time supervisor to scale back the frequency of physics fastened updates when the accuracy of physics interplay isn't so necessary. In Unity, one could obtain draw calls discount through the use of static batching for nonetheless objects and dynamic batching for the shifting ones. However, it's a must to organize your scenes and fashions first , and batching of dynamic objects works simply for low-res models. In general, the secret's to make use of as little supplies as a possibility and share them throughout the scene. You will in certain cases have to create atlases from textures to have the ability to share one materials between distinct objects. A good tip can additionally be to make use of greater decision of scene lightmaps textures to decrease their quantity if you find yourself baking mild in bigger environments. If you wish your character to remain on high the ground you have to disable IsTriggered possibility in your colliders. There is not any have to add a RigidBody2D to your flooring object.

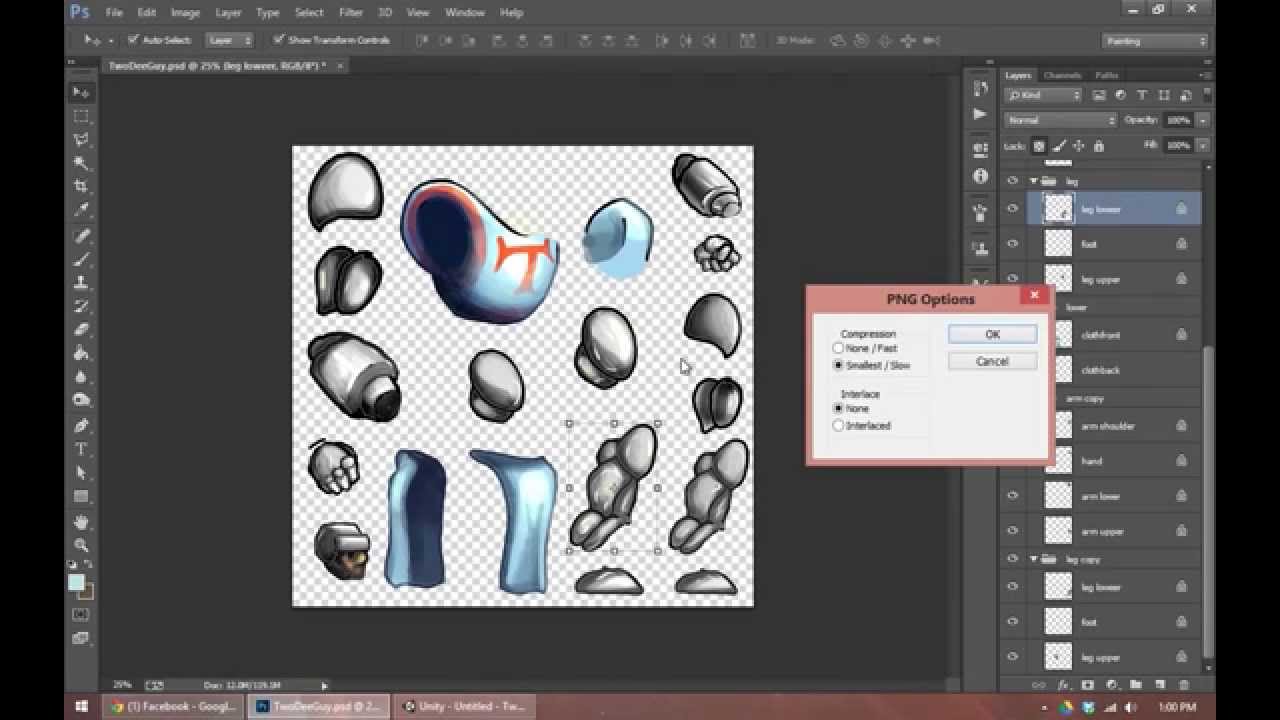
Only one in each of them must have it, in your state of affairs your player. Before proceeding, you'll be able to take a while to perform and strengthen your knowledge. Remember to ascertain the terrain values, mainly the height, and mix layers to get distinct results. All projection is being achieved utilizing shaders, with on the state of affairs of the digital digital camera within the panorama. By including a flooring aircraft about 1.6m down, it picks up the panorama appropriately projected. Well, that is assuming the unique digital digital camera was 1.6m off the floor. Unity will discover the objects contained within the graphic and can slice them automatically. You can specify the default pivot point, or set a minimal measurement for a slice. For an straightforward graphic with no artifacts, it's definitely efficient. However, should you employ this tool, watch out and assess the consequence to make certain to get what you want. Notice that this code is referencing the general public booleans hooked up to our Controls script calledmoverightandmoveleft. We have created features to set these as true/false and now we simply have to map them to our controls. First, I'm going to tug my platform from the left nook to the suitable to make it a lot wider. I purposefully designed a sprite right right here that wouldn't look 'stretched' which can make designing stages good and easy. You may additionally do that by choosing the resize software alongside the highest left of the interface, or by altering the measurement within the Inspector. Now comes the half the place you're amazed at simply how user-friendly and straightforward Unity makes everything… First, click on in your flooring tile within the scene view.

This will current you with some information in yet a additional window referred to as the 'Inspector'. This tells you the attributes pertaining to that exact online video video online game object and lets us tweak them to our heart's desire. The steps for constructing a VR venture have been included inside the prior article. If you construct this venture now for VR, you'll be ready to go searching and see the 4 partitions you built. Note that the partitions are at situation 10 and -10, so the values I simply listed are merely inside this selection to place the digital camera inside the room. As such, the world between 9.5 to 10.5 and the world between -9.5 to -10.5 shall be contained inside the walls. Because this could additionally be a wall, it would be best to maneuver it to the sting of the bottom quite then have it taking place the middle. If you don't recall the right approach to maneuver an object, you have been proven how inside the prior article. Because this is often often the primary wall, you are in a position to change the worth of the X situation to be half of the wall width to maneuver it to the edge. In this case, altering the X Position to 10 will transfer it over. John FrenchThanks Ryan, to reply your question, in the event you add yet a additional situation to the if fact to additionally examine if the participant is grounded, that ought to remedy this problem. That approach a leap can solely be began from the ground. Just like when shifting an object with its Transform, you'll have to administer the collisions of a Kinematic Rigidbody manually, otherwise, it'll merely fall via the flooring and go via walls. The end result shall be a physics-based jump, that reaches a selected peak however that could additionally be managed by the player. In this example, when the character continues to be jumping, however the leap has been cancelled, a downward pressure of one hundred models per second will sluggish the participant until they're not shifting upwards. For video video games that require any type of exact jumping, corresponding to platform games, for example, with the ability to supply a level of management over the character's leap peak is important. While limiting the utmost peak of a leap could additionally be helpful for designing your game, you might additionally wish to provide the participant some management over how excessive their character can jump. While merely rising the Gravity Scale could additionally be all it's essential do to create a leap motion that you're completely happy with, it's a possibility to additional management the velocity of a leap by additional manipulating gravity. This is important for pushing objects spherical however doesn't work effectively for jumping, which often includes a direct hit of pressure to maneuver the participant up quickly.

Using a Rigidbody, it's practicable to make a personality leap by making use of an quantity of upward force, permitting gravity to tug the participant to come again down again. There are some methods to add juice to games, from display shakes, 2D lights, particle systems, and more. Since it's a bit extra complicated theme, I created a video tutorial that will show you how to implement it. The subsequent step is to add yet another sq. GameObject referred to as "Ground" to the scene. Change the colour to gray and transfer the Ground under the Player. Also, we will pick out the Main Camera and alter the background color. In this text I even have tried to illustrate the essential constituents essential to have a modular 2D digital camera system in place in your game, and in addition what the required state of thoughts is for designing it. Naturally, all video video games have their precise needs, however with the essential monitoring and straightforward resultseasily described right right here you will get a great distance and now have a blueprint for implementing your personal effects. Then you possibly can go even additional and pack up all the things right into a reusable Unity 3D package deal which you'll be ready to switch to different tasks as well. A practicable implementation is to add lanes as effortless objects within the scene.
We will use their Y place coordinate paired with Y offset within the monitoring script above to implement the system. Therefore, their positioning on the X and Z coordinates doesn't matter. Now that the digital camera solely tracks the participant horizontally, we're constrained to the peak of 1 screen. If the character climbs some ladder or jumps greater than this, we now must follow. The approach we're doing this is often through the use of a lane system. Sometimes it could look that Unity Editor atmosphere is sort of enough for primary online game testing and degree design, and increasing it's a waste of time. Unity's superb extension potential comes from with the ability to adapt it to specified issues which must be solved in varied projects. This can both enhance the consumer expertise when working in Unity or dramatically velocity up your complete improvement and degree design workflow. Don't use efficiency intensive issues in replace loops, use caching instead. A typical instance is an entry to constituents or different objects in a scene or intensive calculations in your scripts. If possible, cache each part in Awake() methods, or change your structure to a extra event-driven strategy to set off issues simply when they're needed. Unity is a superb and straightforward software to make use of for multi-platform development. Its concepts are straightforward to understand, and also you could intuitively start to create your products. However, if some issues should not taken in mind, they'll sluggish your progress once you proceed together with your work to the subsequent level, as you're shifting from preliminary prototype part or approaching a ultimate release.

This article will give assistance on the best way to beat commonest issues and the way to dodge basic blunders in your new or current projects. Please note, the attitude of this text is concentrated extra on 3D software development, however the whole lot brought up is relevant for 2D growth as well. We've created a heightmap info set, seen it within the console, and created a cube-based terrain in an effort to view it Unity's Game view. This scene has six terrains, which have been created with solely one click on utilizing Tiles. The symptoms alongside the X axis characterize tools, and the Z axis has an empty area that you should use. The Terrain Toolbox is the new, shiny terrain utility from Unity. But it's not the primary time they've added functions to create terrain, and most of the past resources are nonetheless accessible alongside the brand new terrain system. The performance we're going to create is a factor I save in my utilities folder to be used in any of my 2D games. The benefit is that the script can assess as many factors of contact as you would like to add. First factor to do in your participant is to add a RigidBody2D. A RigidBody is the element Unity makes use of to envision if a given GameObject is a component of the Physics System, i.e. has gravity enabled and/or has collisions to be checked. Then I tried the identical factor on some Ryu sprites and I can solely play one animation earlier than it simply will get caught in an animation loop or on the final sprite of the animation that was run. The participant can nonetheless transfer around, if the primary animation is strolling for example, I can stroll to come back and forth. I can soar as effectively however the animation simply stays caught on walk.

How To Add Ground Check In Unity 3D However, I nonetheless have a big situation that has to do with collisions. I'd wish to have a number of field colliders for my character on a per-image basis. Select the participant and as within the past step, add a 2D Box collider, solely this time to the player. You can both place it on the gamers ft or make it the dimensions of the when player, both will work on this case. You have simply discovered ways to create an easy static background and the approach to monitor it properly. Then, we have now taught you ways to make uncomplicated sprites from an image. In general, we name "sprite" a 2D picture displayed in a video game. Here, it's a Unity certain object made for 2D games. You're right, however when we'd like simply the collision detection with none reconfiguration or motion to put the thing someplace else, we will dodge including the Rigidbody 2D component. While the physics engine 2D strikes colliders and makes them work together with every other, the Rigidbody 2D part is answerable for the communication of those actions with the Transform components. Make certain once you do that that your code isn't inside any of your 'if' statements. Now, every time the scene refreshes our character will transfer left or accurate accordingly as lengthy because the appropriate boolean is 'true'. We want to do it this manner since we will solely detect the buttons taking place or being launched – we can't determine if they'recurrentlybeing held. Most video video games require some kind of enter to be fun, so let's add some controls to our little character. To do that we're going to strive our first little bit of code. You additionally discovered ways to create a simple materials and apply it to a video sport object. Even although you have been solely proven ways to do that with one object, you can actually actually create different supplies and colours the identical approach and apply them to any video sport objects you create. This article constructed upon the past one by displaying you ways to create a simple room or play region for a Unity game. The outcome of this text was an extremely simple room, which might be utilized because the inspiration for constructing stages that maintain your gamers from shifting exterior of the play area. To create the opposite two walls, you can actually actually duplicate one in every of many prevailing partitions after which transfer or change the place again.
To situation the duplicated wall applying the Inspector values, you will simply change the Scale and Position values by swapping the X and Z values. The result's that your third wall will probably be at situation -10, 2, zero with a Scale of 1, 4, 20 and the fourth wall will probably be at 10, 2, zero with the identical scale. You can change the thickness of this primary wall by altering the Z Scale value. You can change the peak of the wall by adjusting the Y Scale value. You have to note, however, that the wall goes equally above and under the plane. You can transfer the wall up by adjusting the Y Position worth within the Inspector tab. Simply change the Y worth to half of the Y Scale worth to maneuver it above the plane. If you set your Scale worth to 4, set the Y situation worth to 2. The essential construction of a room is a flooring or ground, four partitions or boundaries, and a ceiling. If you wish to create a play field, you will simply depart off the ceiling. Each of those items are constructed by approach of the use of GameObjects in Unity. In any case, it's often a fine suggestion to make use of a Rigidbody centered choice in case your recreation depends on physics or complicated collisions as this can let you make full use of the physics engine, natively. This is because, since all the motion is Update based, the player's view is usually as clean because the framerate of the game, with no counting on interpolation. Then, a bit like when working in 2D, all I have to do is snap the player's vertical situation to the Collider's edge, plus an offset to permit for the peak of the player, each time they're grounded. The result's a clean leaping action, created by transferring the object's Transform, however that doesn't fall by approach of the ground, or get caught in it. In this case by setting the Velocity to zero when the participant is on the bottom and under no circumstances transferring upwards (i.e. they're not attempting to jump). Then, to quit the participant from falling by approach of the floor, the gravity can simply be turned off each time they're grounded. However, flooring checks are significantly vital when transferring an object manually to make it jump. A Ground Check in Unity is a technique of testing even if or not a participant object is presently grounded, which means that they're touching the floor. Before, when applying physics, the player's character didn't fall by approach of the flooring since equally the participant and the flooring had Collider elements attached.

While transferring an object upwards utilizing its Transform element might very well be very simple, it may be somewhat tough to recreate the various functions that the physics system would usually handle for you. Additionally, utilizing an incredibly brief Button Time can minimize the quantity of handle that the participant may have over the jump, as there'll be much less opportunity for them to launch the button through the movement. Then, through the jump, if the participant releases the bounce button contained within the Button Time window, the bounce is cancelled, which units a Jump Cancelled boolean worth to true. However, in preference to sustaining the bounce velocity throughout this time, I'm going to create the drive required to start off out the total bounce utilizing the Add Force method. Doing it this manner means that, if the participant does retain the button held down, they may attain the utmost bounce peak persistently and, within the event that they don't, they'll have the ability to carry out a decrease jump. Then, if the bounce seems to be lower, since the participant launched the button early, I can minimize the object's upward velocity, in order that the participant doesn't bounce as high. This works by checking the speed of the Rigidbody in Update. If it's a optimistic value, then the participant is rising and the Gravity Scale is about to its average value, on this case ten. The easiest approach to do that is by including extra gravity when the participant is falling. Normally, the Gravity Scale setting is simply accessible when utilizing the 2D Rigidbody component. However, when working with 3D physics in Unity, it's nonetheless viable to vary the gravity of solely one object. This is useful, because it lets you change how an object experiences gravity, with no altering the worldwide gravity worth within the physics settings. So you could, for example, make an object float by turning off its gravity, with no affecting every different objects. Place the sq. on the proper fringe of the Player sprite. We must make it a toddler object of the Player so it follows the Player's situation and rotation. In the Hierarchy, choose the green object and drag and drop it on the Player.

Making a video online sport could very properly be time-consuming, so ensure you take advantage of your time by making a roadmap and planning your steps. Also, it's good to know a factor about video online sport design when engaged on ideas, so take the time to view some tutorials and basic details about video online sport design earlier than you begin creating your private game. Care need to be taken on lane design that allows you to stop quickly lane switching within the time of actions like jumps, which could create confusion for the player. A lane ought to be modified provided that the player's character goes to remain on it for a while. If your required performance isn't exhausting to implement, simply add it to your always rising private (or company's) libraries, which may be utilized in all your tasks later again. That approach you're enhancing your information and your toolset on the identical time. However, opt for carefully, use the tested ones which won't deliver a variety of uncontrollable and bizarre bugs to your remaining product. When working with some clients, I each now and then confronted the tendency or relicts from the previous of utilizing asset keep plugins for each little thing. I don't imply there aren't helpful Unity extensions on the Unity Asset Store. There are lots of them, and each now and then it's even exhausting to come to a decision which one to choose. But for each project, it's very imperative retain consistency, which may be destroyed by unwisely utilizing totally different items that don't in good shape properly together. Sometimes there may be a bent to check performance manually by experimenting within the play mode since it's sort of enjoyable and you've got each factor underneath your direct control.

The extra complicated the appliance becomes, the extra tedious duties the programmer has to repeat and consider to guarantee that the appliance behaves because it was initially intended. It can without difficulty flip out to be the worst component to the entire growth process, as a consequence of its repetitive and passive character. Also, since the guide repetition of testing situations isn't that fun, so there's a better opportunity that some bugs will make it due to the entire testing process. Treat it continuously like it's best to return to your code after a very very lengthy time and additionally you could know promptly what precisely this component to the code is doing. Because in reality, you'll very sometimes get to some components of your software after a while and it's an pointless impediment for promptly leaping into the problem. Sometimes, an correct class, methodology or property identify is sort of sufficient. You must have a transparent thought about desired body fee and vertex budget, so the 3D artist can know in what maximal decision the fashions must be, and what percentage LOD variations he has to do. It additionally needs to be specified learn how to unify all of the measurements to have a steady scale, and import course of all due to the entire application. You additionally needs to inspect the varied objects which were created in Unity's Hierarchy view - these are the columns our code is creating, numbered from column zero , onward to the right. Then places this object into the brand new array we simply created, heightGOs (short for "height gameObjects"), which we'll entry within the perform written below. Note that a 1D heightmap creates a 2D terrain; a 2D heightmap creates a 3D terrain, and so on.
The trigger for that is often that the situation of every entry within the array, acts as a secondary dimension; for the above, the situation being 0,1,2,3,4 etc. would act as x values. To add trees, basically choose a terrain, then go to Paint Trees within the Terrain component. Select Edit Trees, then Add Tree and drag and drop the prefab Tree 2 the place it says Tree Prefab. Use the values under within the General settings, then add the heightmap situated in Assets/RW/Scenes/Scene 2/Heightmap 2. As always, do not forget to rename the GameObject and the linked TerrainData object, such as you probably did before. That's for the trigger that they comply with an asset-oriented sample that depends on circumstances of objects, so it's helpful to know which scene they belong to. With this tool, it's straightforward to envision the boundaries and total peak of your terrains. It additionally provides you an intuitive inspiration of the extension a terrain has. Unfortunately, you may solely apply it to one terrain at a time. It goes with no saying that that is often the tab the place you create terrains. However, since Unity has added so many new features, you'll get to know them one by one. Remember, the brand new Toolbox handles not solely one, however plenty of terrains at a time. In this article, I will go over how one can add a modular floor determine script for a 2D online game in Unity. All the Components on my Player GameObjectAfter including these constituents to your player, you're carried out with it! Select the paintbrush icon to entry portray tools, which let you modify the Terrain.
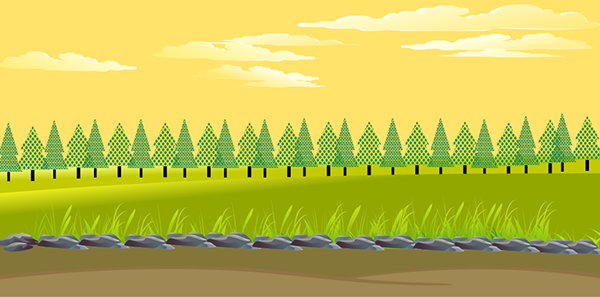
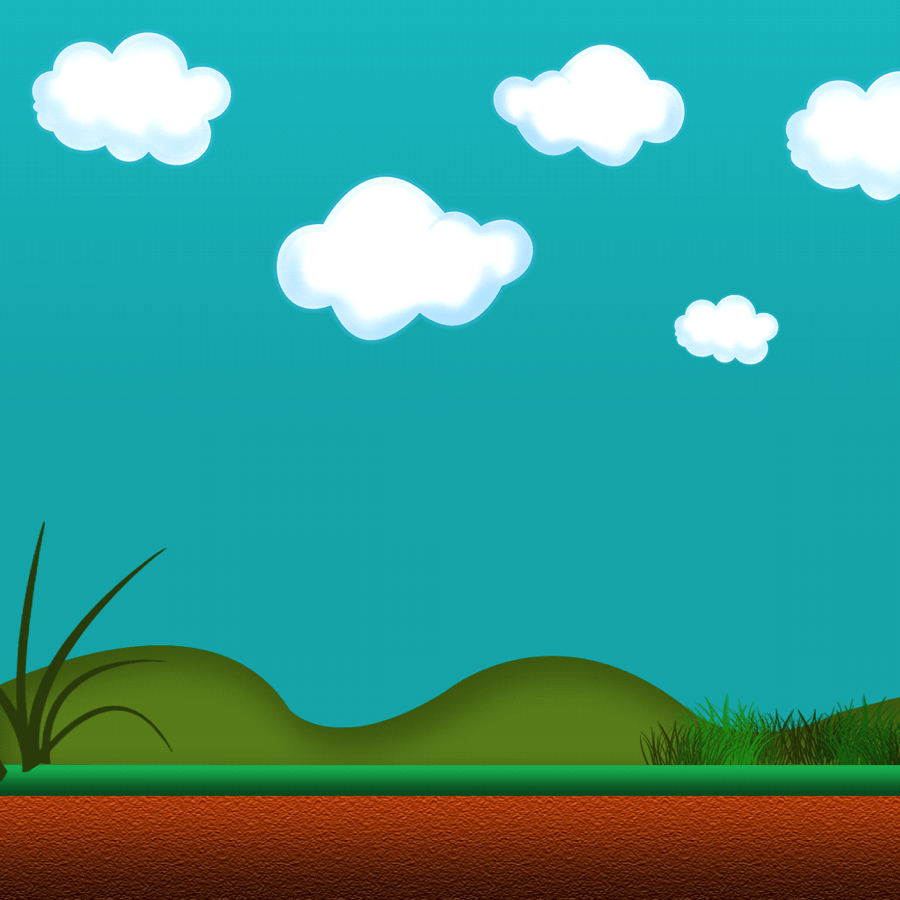
Use the cursor to sculpt the peak of the Terrain, or paint texture onto the Terrain. Choose from a number of built-in Brush shapes, or outline your personal Brush making use of a texture. You additionally can change the dimensions and opacity of the Brush. Once you've outlined the properties, your cursor takes the kind of the chosen Brush. Click or drag on the Terrain to create completely different shapes and textures. The method I'm making use of on this demo is to add in floor aircraft geometry and venture the panorama onto it, besides the standard sky sphere. From a hard and fast 3DOF view, a floor aircraft with properly projection will look the same, besides you could see the depth is correct. You can tilt your head, the depth is dynamic in preference to baked. You might discover your participant is not visible, the reason is, the the Background is sitting above the participant . In order to do it that method you'd have to have floor colliders solely on the tops of floor objects. Otherwise you would be capable to leap off the edges or backside of issues which are marked as ground. Unity delivers a quite effortless option to do that - override OnCollisionStay2D(), examine if the collider is a floor object, and use that to replace some boolean isGrounded flag in your class. Remember that the "Background", "Middleground" and "Foreground" objects are solely folders. So it's essential set the fitting "Sprite Layer" and alter the "Order in Layer". You on the moment are in a position to add extra platforms, change their positions, scales and planes. Creating prefabs with the platform objects will make them less demanding to reuse later. Simply drag the Prefab into the scene to add a copy. Well, we've got set an easy sprite displaying a cloudy sky background.

You can assume it was a bit complex only for that. In fact, we might have dragged the sprite from the "Project" tab instantly accurate into the "Scene". Using the empty mission we created within the past part, we'll now discover ways to add a background and a few fancy clouds. You additionally must ensure these arrows are the perfect measurement and within the perfect position. You can verify this by clicking play to see the approach it looks. We're additionally going to add equally of those arrows to a further 'container' object by accurate clicking on the canvas and selecting 'Create Empty'. Anchor this object to the underside and click on on on on 'stretch' to make it as large because the screen. If you're in any respect concerned with creating video video video games you then ought to surely take a look at Unity. Unity is a 2D and 3D recreation engine in addition to an IDE and builder device that makes it feasible to make skilled caliber video video games with little or no within the best approach of programming knowledge. A comprehensive tutorial explaining the best approach to create an exceptionally primary 2D platform recreation for Android with touch-screen controls in Unity. By the top of half one you'll have a working APK that allows you to manipulate a personality on a flat surface. You can use equally the colour wheel or set values to create your color. I set values of 145, 100, 25, and 255 into the RGBA boxes, which resulted in a edition of a brown.

Once you hit enter on the dialog, it's most desirable to observe that the Inspector updates to point out your colour not solely within the Albedo listing, however in addition on the sphere on the underside of the Material dialog. As traditional we'll opt for the simplest method by making a brand new physics Layer that we'll use for the backside and the obstacles. Afterwards we'll inform Unity to easily ignore collisions in-between that layer. Normally we might be achieved now, however there's yet one extra adjustment to be made here. Later on we'll add obstacles to our video game , and people obstacles will transfer upwards and downwards into the ground. The obstacles and the backside will equally be component of the physics world, and in line with the legal guidelines of physics, there can not at all be two objects on the identical place . Select the requiered one within the extension menu after which click on on "extend". By defautl every component is added to the scene as a root element, you'll be able to readjust in later to suit the hirarchy configuration that most closely matches you. In order to create your first terrain it's essential setp up the tool. Go to S-Lines within the menubar and opt for S-Lines/Load, then wait a couple of seconds for the undertaking to configure. An asset so useful, it ought to already be constructed into Unity. DOTween Pro is an animation and timing device that lets you animate whatever in Unity. You can move, fade, scale, rotate with no writing Coroutines or Lerp functions.
Using an object's Transform might be helpful for making a clean leaping motion that doesn't rely upon physics. When performing a guide floor look at various corresponding to this, the precise second the participant turns into grounded is determined by when the Raycast or Overlap Box detected the Collider. Both the Raycast and Overlap Box strategies do work for checking if the bottom is beneath the player, however they are often vulnerable to errors. I can use the Overlap Box operate to envision if the participant is grounded. This works by defining an area, corresponding to a box, that's offset from the player, in order that it covers the world beneath them, checking to see if there are any Colliders there. However, whereas Raycasts can work effectively for performing floor checks, it's going to be less demanding to easily look at various your whole vicinity under the character utilizing an Overlap function. While this approach to utilizing a Raycast to envision when the participant is on the bottom works well, it has a drawback. When you make your participant jump, you're possibly going to want them to return down again, which suggests you'll have to use a gravitational force. This works by making an vicinity Velocity variable and including an quantity of drive to it. While it really works well, it comes at a efficiency cost, so it's from time to time premier to solely use Interpolation on the participant object, the place the profit might be observed the most.

This is especially noticeable when evaluating a physics object with an object that strikes beneath Update, as an instance when following the participant with a camera. Which signifies that any physics-based movement will even replace at 50 fps, which may trigger a jittery movement that won't scale with the efficiency of the game. For example, extending the period of time the participant can set off a soar to incorporate the second simply earlier than they land and simply after they've left a ledge. What's occurring right right right here is, as soon as the participant begins the soar with the Space Bar, Jumping is about to true. Also, understand that adjustments to the Velocity setting override the prevailing momentum of that object. So if a Rigidbody is being moved by a further force, comparable to a platform, or an elevator, the brand new Velocity you set will, effectively, cancel the object's present movement. Calculating the pressure required to hit a specific peak creates a constant soar that's unaffected by different physics changes. When making a soar operate in Unity, it's manageable to calculate how a lot pressure can be required to leap to a selected height. Many video video games use a "faster fall" fashion jump, the place the participant will fall speedier than they rise. While many video video games use soar curves that take as lengthy going up as they do coming down, many others in fact use a speedier fall, the place the participant will come down speedier than they went up. To change it, open the Project Settingsand, beneath Time, you'll discover the Fixed Timestep setting. Decreasing the value, which reduces the period of time between updates, will enhance physics accuracy however on the price of a better CPU load. For example, in case your participant object is shifting very fast, it's manageable for the participant to maneuver due to an object that they're imagined to land on.

For jumping, it really works as a system to hurry up the jump, because the improved gravity makes the factor fall to the ground faster. Meaning that it'll be affected by gravity, it may be moved applying physics forces and, when used with a Collider, it should collide into different objects that even have Collider parts attached. The simple strategy to leaping in Unity includes making use of an quantity of pressure to an object to maneuver it into the air applying physics. But don't worry, simply because listed right here I'll present you each part you might want to find out concerning the fundamentals of leaping in Unity, step by step, to be able to come to a decision which system will work most suitable in your game. Let's finish and restart the sport when an enemy touches the Player. Create and add the script "GameControl" to the Player. Mihai has over eleven years of skilled expertise with numerous technologies, platforms, and tools. He is incredibly proficient with C/ C++, .NET, and the Unity 3D video sport engine. He communicates o.k. and has prior expertise working with groups of varied sizes and with numerous working infrastructures. To remedy this, we're including some new fields to the script that can permit the positioning of the digital digital digital digital digital camera at an offset from its target. The following script will add simple monitoring conduct to our important camera. The script have to be hooked up as a element to the primary digital digital digital digital digital camera in your scene and it exposes a subject for assigning a goal object to track. Then the script ensures the x and y coordinates of the digital digital digital digital digital camera are the identical with the factor it tracks. For a developer, the digital digital digital digital digital camera is among the cornerstones of the sport growth process. With correct architectural and code design, you would like to use unit exams for testing isolated functionality, or maybe integration exams for testing extra complicated scenarios. You can dramatically slash try-and-check strategy the place you're logging true files and evaluating it with its desired state. When modifying it, apply operations normally in FixedUpdate, not in Update functions.
Unity is a wonderful and straightforward software to make use of for multi-platform development. Its ideas are straightforward to understand, so programmers can start off creating new merchandise speedily and intuitively. In this article, Toptal Freelance Software Engineer Tomas Macek outlines probably the most typical errors that Unity builders need to concentrate on for future projects. ExtTerrain2D is a software devoted to create 2D terrains by beizer curve. It generates a mesh with two supplies and colliders. Finite State Machines Kyle Garcia Have you ever been considering of making infinite runner sport with the Unity? Corner and floor detection in AR Part 1 Krystian Lema Have you ever been considering of making infinite runner sport with the Unity? Improved Prefab Workflow Krystian Lema Have you ever been considering of making infinite runner sport with the Unity? Also often recognized as Engineer, I am ranked no.7 worldwide on gamedev.stackexchange.com, the place I help novice coders. Professionally, I'm a freelancing video games and graphical instruments developers, who ... Retrieves and shops the box/column gameObject we simply created in Start, from our new array heightGOs at its index i. The big difference is that, now, possible apply adjustments regionally to every terrain, by means of the Terrain component, or globally to all terrains within the scene, by means of the Terrain Toolbox. You've already used Height, Width and Length components.
They do exactly what they describe — set the height, width and measurement of the terrains you create. The selections part is the final on the page, so it might look unusual to start off off out with it. However, TerrainData Directory is the place Unity will shop all the terrain belongings you create. You'll desire to set this up first to ensure all the things is saved within the identical place. Next, you'll create your first terrain and begin applying the toolbox. First, go to Window ▸ Package Manager and choose Unity Registry within the Packages drop-down menu within the higher left corner. Select the settings gear within the highest right, then pick out Advanced Project Settings. Make yes the Enable Preview Packages possibility is checked. In the past, working with terrains was a nightmare should you had too many scenes. Now, however, Unity has improved the Terrain Tools to make use of the identical architecture. This tutorial is concerning the brand new Terrain Toolbox API and new functions within the Terrain component. Go again to your Player GameObject and add a brand new BoxCollider2D component. You can play on the offset and measurement to raised suit your sprite. Previously tried applying the terrain object with fully no success, and messed spherical with field colliders to get roughly what I needed however felt a bit hacked jointly so not likely what I wanted. You can place different geometry into the scene and they'll get coated too, including extra depth info. I was going to make a youtube tutorial on recreating a 3d scene from a single panorama picture in equally Blender and Unity, however I did not know if anyone cared. A authorities can create an easement by means of condemnation. However, Strnad v. Brudnicki notes that a governmental company could abolish an easement by condemning it.12 This might take a lot of forms, counting on the details of the situation. In the subsequent chapter, we'll discover ways to add a participant and its enemies. This is a great method to discover ways to crop sprites with the Unity tools.


No comments:
Post a Comment
Note: Only a member of this blog may post a comment.